 CloudEdge App Docs
CloudEdge Wireless Security Bulb Camera
User manual for the CloudEdge Wireless Security Bulb Camera, covering the packing list, product structure, indicator-light status, app download, QR-code and AP pairing, troubleshooting, sharing, and the live-view functions.
This manual explains how to set up and use the CloudEdge Wireless Security Bulb Camera with the CloudEdge app, from the product layout and indicator lights to pairing the camera over Wi-Fi and using the live-view functions.
This Light Bulb Camera works through the Power Plug Camera type in the CloudEdge app. For more help, see the Power Plug Camera FAQs.
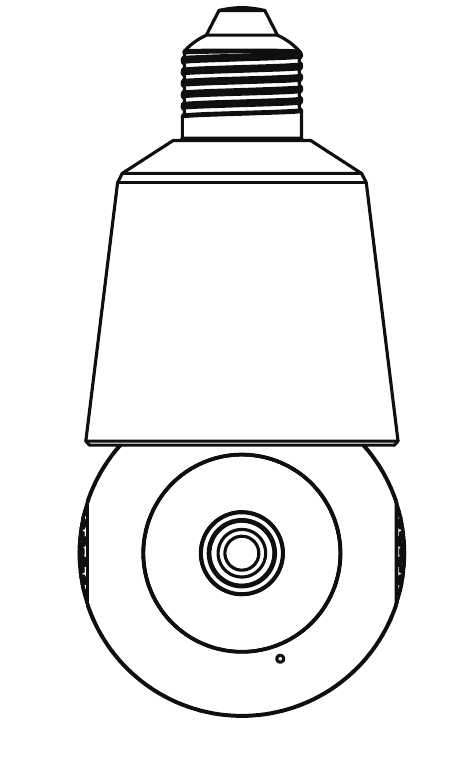
1. Packing List
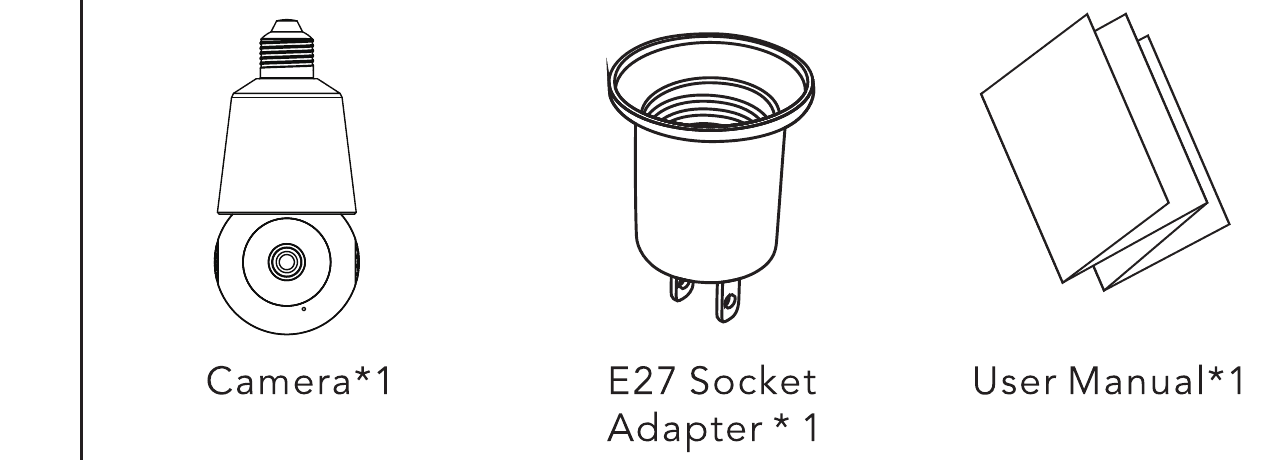
- Camera — × 1
- E27 Socket Adapter — × 1
- User Manual — × 1
2. Product Specification
| Item | Specification |
|---|---|
| Resolution | Up to 2304*1296 Pixel |
| Viewing angle | D:92°*H:77°*V:42° |
| PTZ horizontal angle | 352° |
| PTZ vertical angle | 46.5° |
| Waterproof level | Not waterproof |
| Detection distance | Approx. 33ft |
| Dimension | Ø 71*154mm |
| Video format | H.265 |
| Wi-Fi standard | 2.4GHz (IEEE 802.11 b/g/n) |
| Wi-Fi maximum rate | 54Mbps |
| Wi-Fi distance | Open straight distance ≥ 120 m |
3. Product Structure - Front
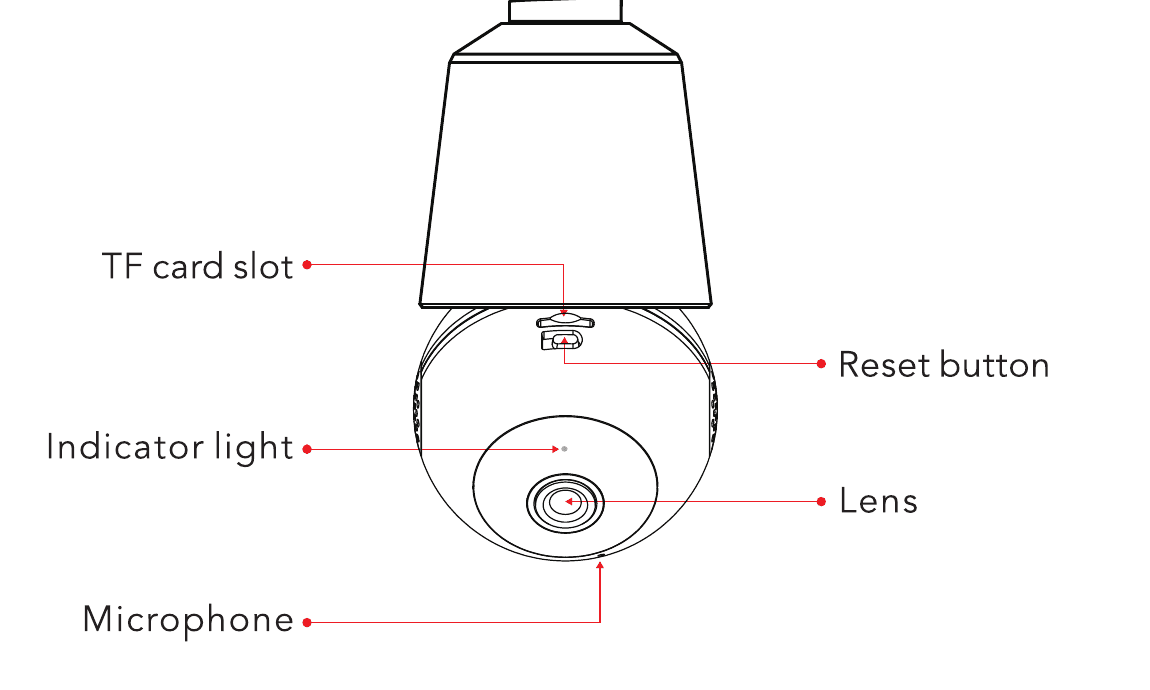
- TF card slot
- Indicator light
- Microphone
- Reset button
- Lens
Indicator Light Status
| Indicator Light Status | Camera Status |
|---|---|
| Red light solid | Network is abnormal |
| Red light slowly flickering | Waiting for Wi-Fi connection |
| Red light quickly flickering | Connecting to Wi-Fi |
| Green light solid | Wi-Fi connection succeeds |
| Green light flickering | Camera is working |
4. Product Structure - Back
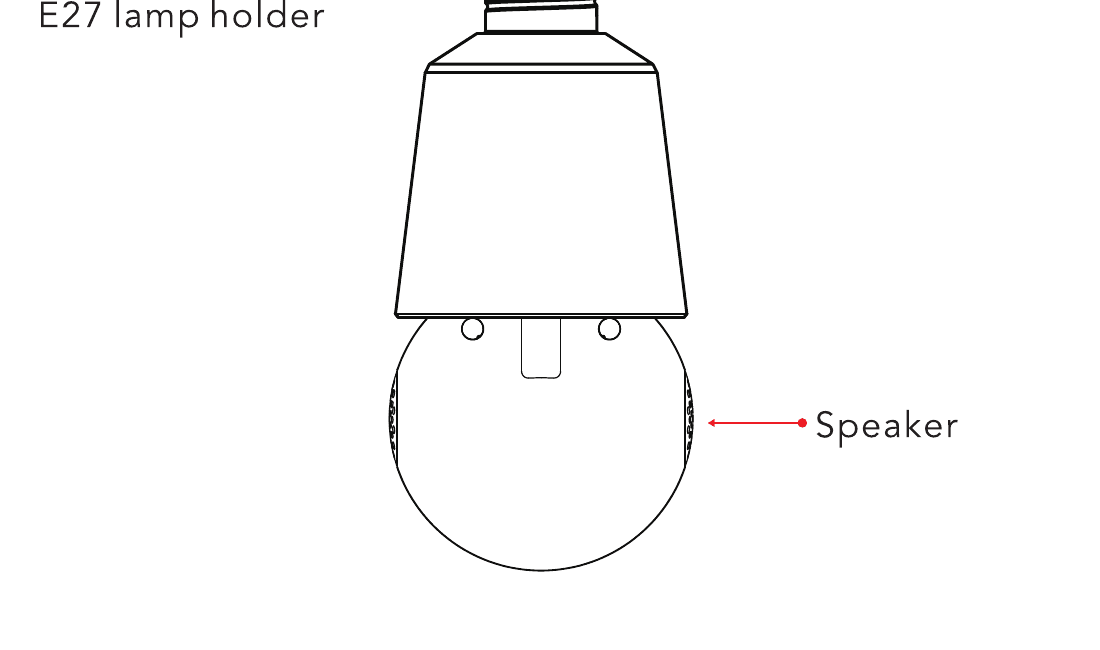
- E27 lamp holder
- Speaker
Description
- RESET: Press "Reset" for about 3-5s until hear a "BUGU" sound to factory default setting.
- TF card slot: Support TF card local storage (Maximum support 128G). Please format the TF card in the "CloudEdge" APP for the first time using.
5. Download the App
Scan the QR code below or search the "CloudEdge" in APP Store or Google Play, then download and install the APP.
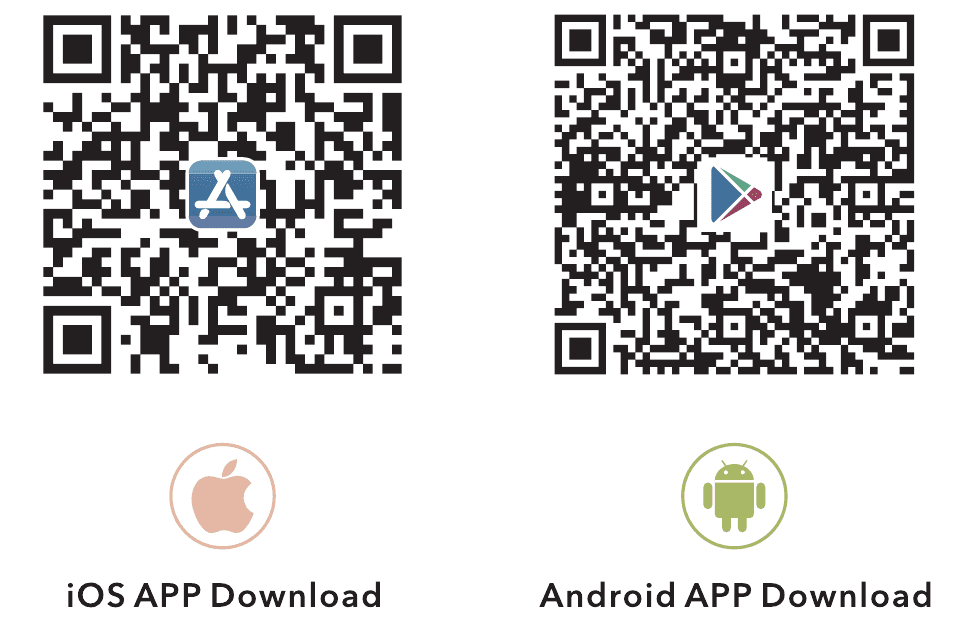
Use your phone camera or Google Chrome to scan the QR code.
User Sign up, Log in
- Sign up: Select your country to register an account with your email.
- Log in: Select your country, enter the existing account and password to log in.
6. Add the Camera
Before Adding
Screw the camera into the socket that comes with the package, and plug it into the outlet to power on the camera.
Wait for the camera red indicator light to flicker slowly (If not in this status, long press the "reset" button for 5s until hear a "BUGU" sound).
Open the "CloudEdge" app, click "+" icon, select "Power Plug Camera" and "Smart camera (WIFI)".
Tips:
- The included adapter is ONLY for pairing the network, don't touch the inner interface of it when it is plugged in.
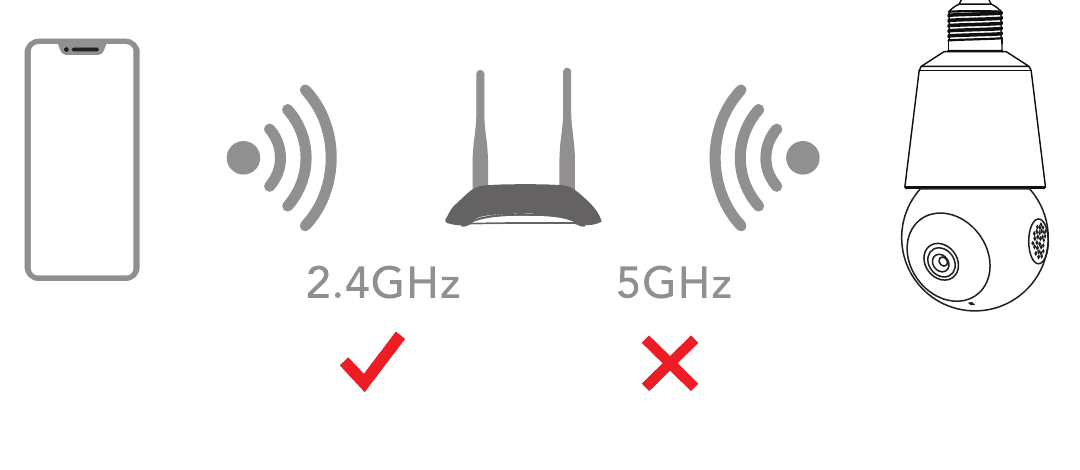
- This Light Bulb Camera ONLY works with 2.4GHz Wi-Fi, 5GHz Wi-Fi is not supported.
- Please put the camera near the router during setup. After the connection, you can move the camera to your prepared lamp socket.
- The device is added in the QR code mode by default. If this mode fails to be added, please try the "AP mode".
ATTENTION: To avoid electric shock risk, all power must be TURN OFF before each installation and removal of the camera.
Method 1: QR Code Mode
If you are the first time adding the camera, please directly click "Next" on steps ① & ②.
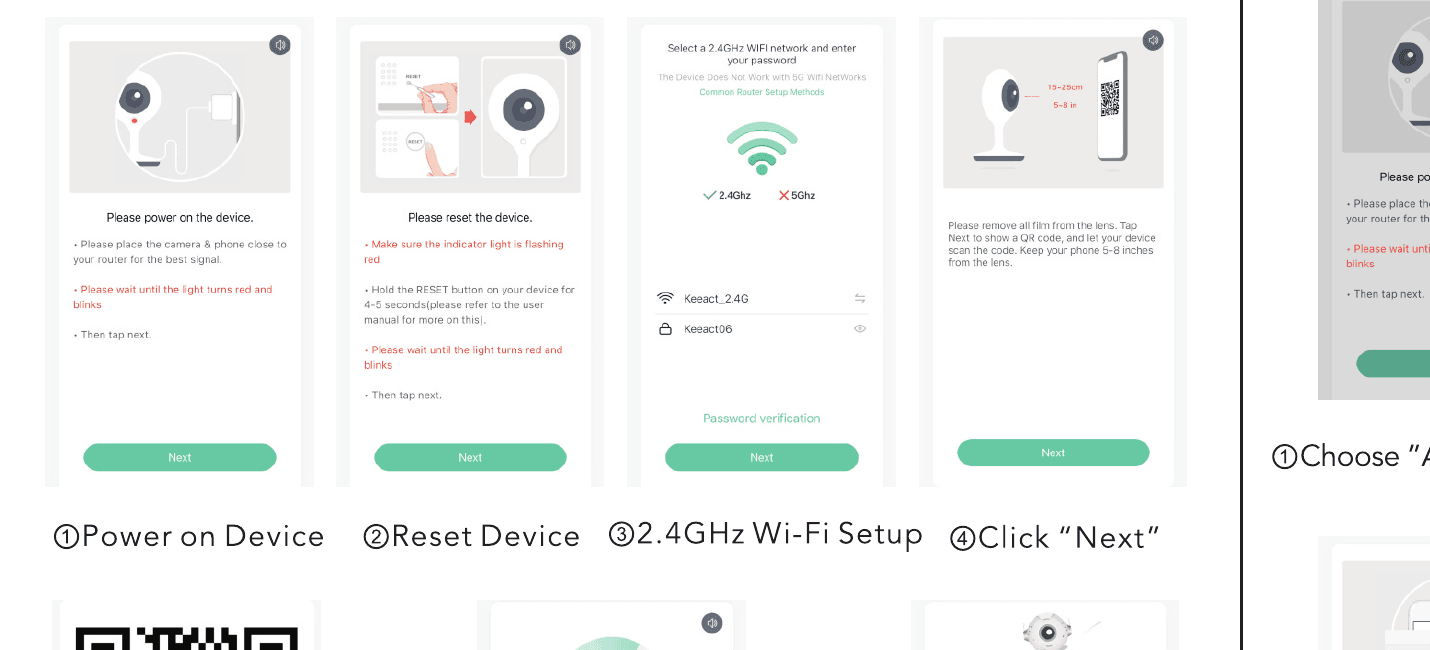
- Power on Device
- Reset Device
- 2.4GHz Wi-Fi Setup
- Click "Next"
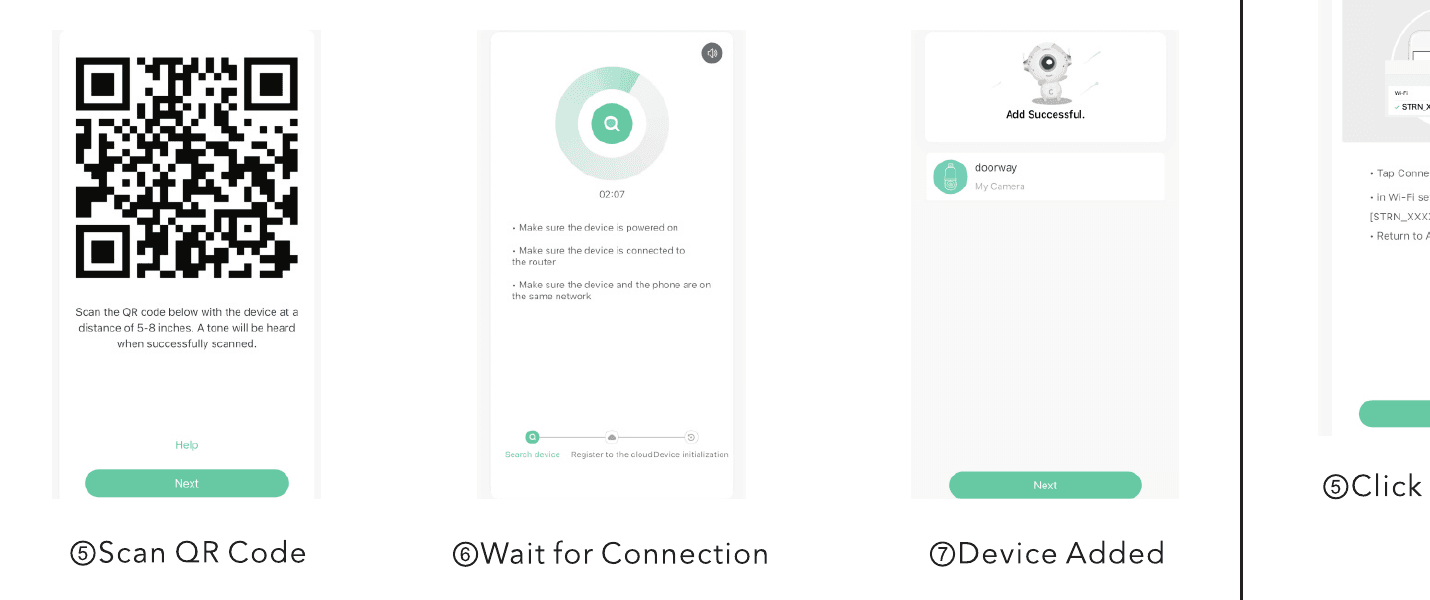
- Scan QR Code — Scan the QR code below with the device at a distance of 5-8 inches. A tone will be heard when successfully scanned.
- Wait for Connection
- Device Added
Method 2: AP Mode
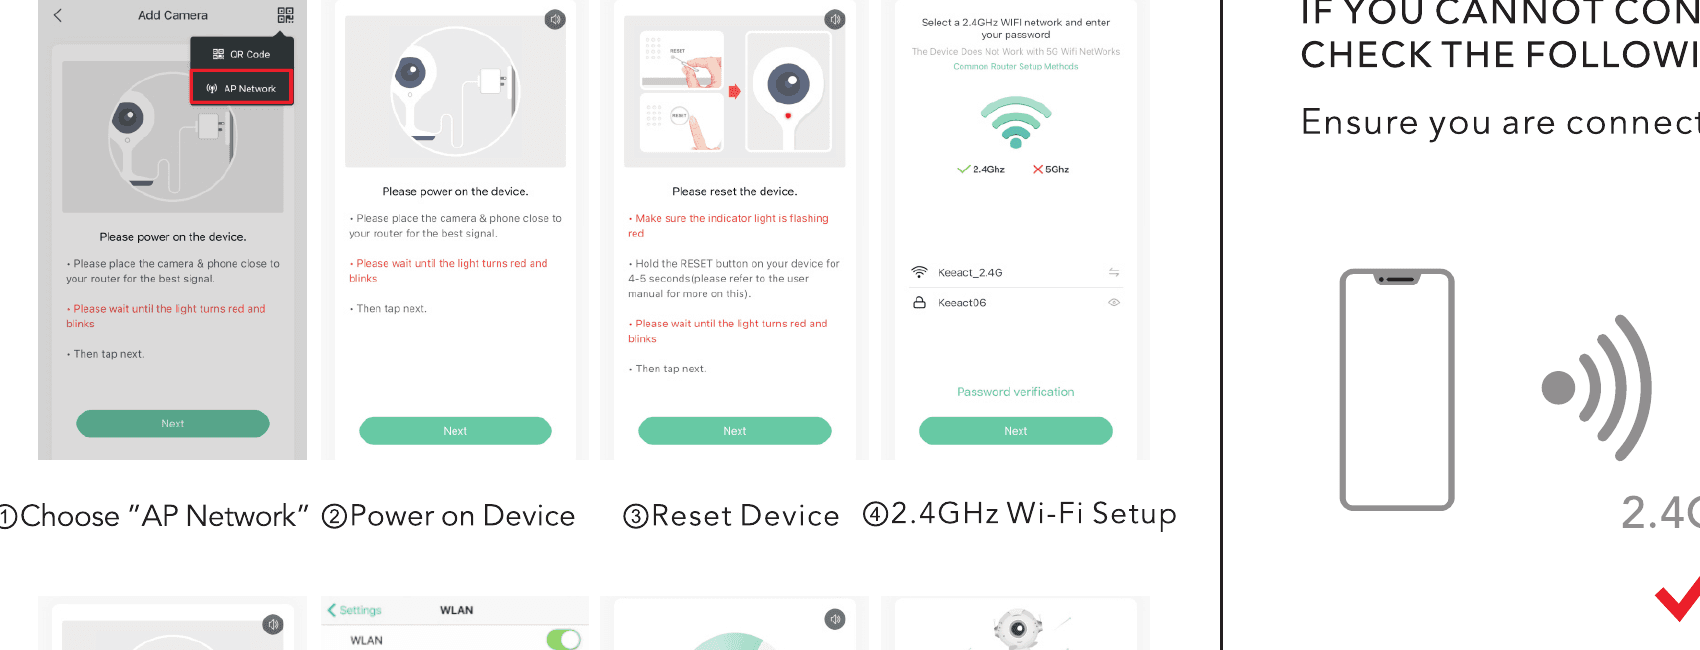
- Choose "AP Network"
- Power on Device
- Reset Device
- 2.4GHz Wi-Fi Setup
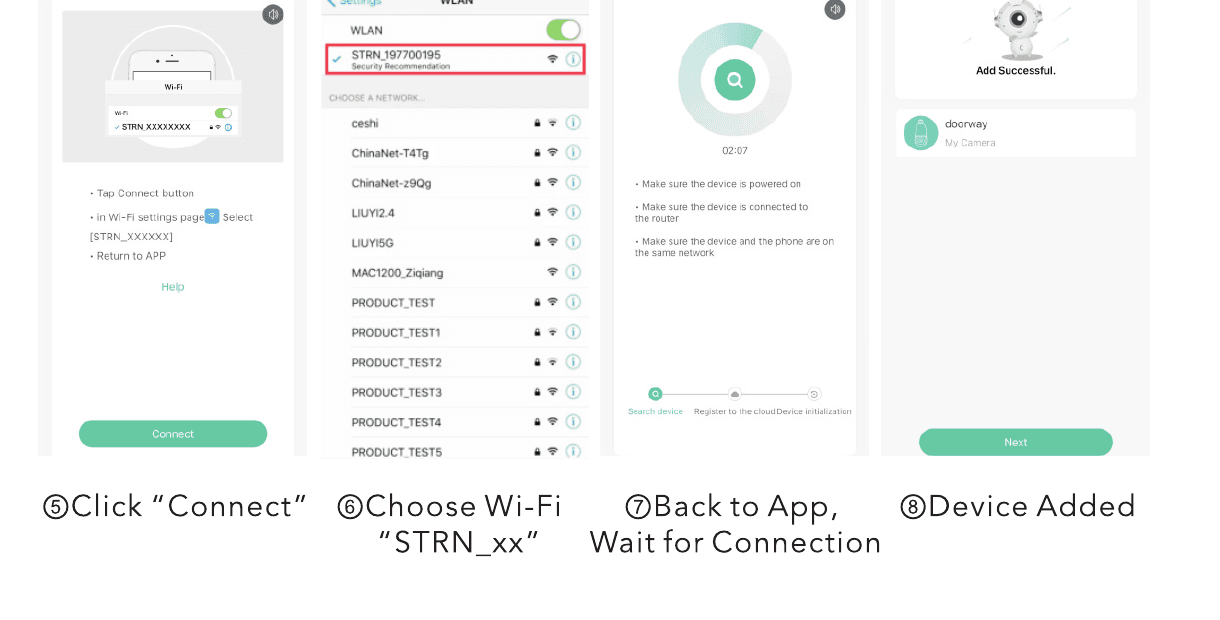
- Click "Connect"
- Choose Wi-Fi "STRN_xx"
- Back to App, Wait for Connection
- Device Added
7. Troubleshooting
If you cannot connect the camera to the internet, check the following steps. Ensure you are connecting to a 2.4GHz Wi-Fi not 5GHz.
- Ensure Wi-Fi password or SSID is correct
- Ensure the camera is placed as close to the router as possible
- Ensure the camera is powered on and the camera red indicator light flickers slowly
- Ensure you are using the correct APP (CloudEdge)
- Ensure the camera is scanning the QR code on the phone in the correct way
- If the above doesn't help, reset the camera and start pairing again
Important Notes on Reducing False Alarms
- Do not face the camera towards the roadside or in crowded scenes, facing the sun ray, or heavy traffic.
- Objects with human body shapes such as stuffed toys may be detected as human and trigger the alerts, remove them if they constantly show up in the camera.
- Adjust the sensitivity of motion detection appropriately.
8. Share the Camera
When you need to view the camera with other family members or friends, you can use this function. The administrator whose account is bound with the camera for the first time can share and set the device.
NOTE: You can not share to accounts in different registered regions.
Click 'Device Share' on the setting page.
Click 'Scan QR Code'. The shared user should register a new account, then tap 'Me' > 'His Name' > 'My QR Code'.
Scan the QR code of the shared user, and you will receive the confirmation notification after the shared user confirms the sharing.
If you choose 'enter account', you could search for the account you would like to add.
9. Function Introduction
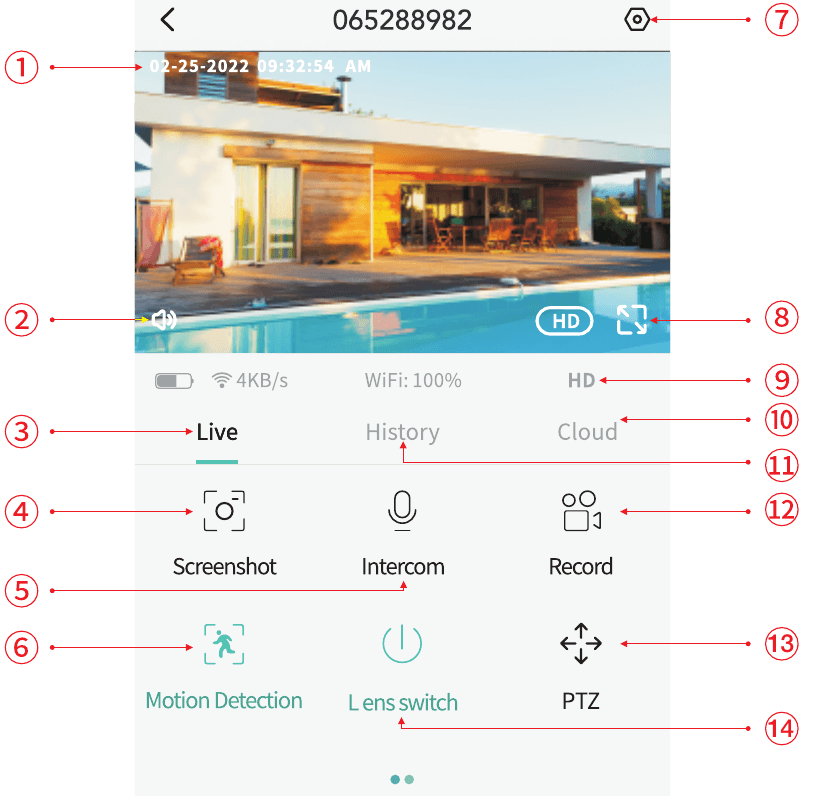
- Time Stamp
- Sound of the Device
- Live
- Manually Screenshot
- Long Press to Talk
- Motion Detection Setting
- Camera Settings
- Full Screen Preview
- Switch Image Quality
- Videos Saved on the Cloud
- Videos Saved on the SD Card
- Manually Record
- PTZ Method
- Lens On/Off/Schedule Time
10. FAQ
For more detailed FAQs, please log in to the app, tap "Me" > "Help".
Q: Failed to add during network configuration?
A: Please make sure your phone is connected to a router in the 2.4GHz band, and make sure that the Wi-Fi password is correct.
Q: After scanning, adding is still unsuccessful?
A: Restart the device and reset it, then try to add it again.
Q: The device cannot preview normally?
A: Please check if the network signal is too weak, please put the camera close to the router, if still cannot preview, reset the camera and add it again.
Q: After resetting the device, why is the camera still in the device list?
A: Resetting the device only to reset the camera's network configuration, but cannot change the configuration on the APP. To delete the camera, you must log in the APP to delete.
Q: How to switch the camera network to another router?
A: Remove and reset the device first and then configure the network for the device again through the APP.
Q: Why does the device can not recognize the TF card?
A: Please insert and remove the TF card after power off; Please check if the TF card is working normally and whether it is in FAT32 format; When the mobile phone or the device is working in unstable network, the APP also will prompt that the TF card cannot be recognized.
24/7 Customer Service Email: [email protected]
BondFree Bulb Camera Quick Installation Guide
Quick installation guide for the BondFree indoor bulb security camera with the CloudEdge app, covering the packing list, appearance, LED status, app setup, Wi-Fi pairing, recording, playback, sharing, alarms, installation and troubleshooting.
BOIFUN 4G LTE Security Camera
Setup and usage guide for the BOIFUN 4G LTE security camera with the CloudEdge app — SIM card selection, power-on, APN settings, charging, installation, PIR detection and battery tips.