 CloudEdge App Docs
ulofy Smart WiFi HD Camera (PTcam) Quick Start Guide
Quick start guide for the ulofy PTcam Smart WiFi HD camera, covering what's included, product overview, CloudEdge app setup, mounting, account registration, step-by-step WiFi pairing, and safety information.
This quick start guide walks you through setting up the ulofy Smart WiFi HD Camera (PTcam) with the CloudEdge app, from unboxing and mounting to registering an account and pairing the camera to your WiFi.
This WiFi camera can only connect to a 2.4GHz WiFi signal — it does not support 5GHz WiFi. Please select a 2.4G WiFi when setting up the app. For more help, see the FAQs.
ulofy Care
Hi Customer,
Thank you for choosing our security products. We have always put our customers first and foremost. There are 3 things you should know before using this product:
- Micro SD card — If you don't have a Micro-SD card available at home now and don't want to spend extra time choosing one, please contact us directly. TIP: The Micro-SD card gotta be formated after inserting it up.
- Select 2.4G Wi-Fi — The product only supports 2.4G Wi-Fi, please select 2.4G Wi-Fi when setting up the app.
- Select installation location — Please use your mobile phone to test the coverage of the home wifi signal at the planned installation position before installation, so that the product can receive a better signal.
Get all the tutorial videos of using product including but no limit to set up the app, installation and format micro SD card, visit: www.getulofy.com
Join us today as two ways below to get all of your problems solved by one-on-one live chat and phone service tech support.
1. What's Included
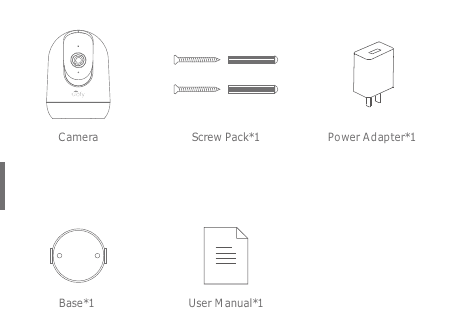
- Camera
- Screw Pack ×1
- Power Adapter ×1
- Base ×1
- User Manual ×1
2. Product Overview
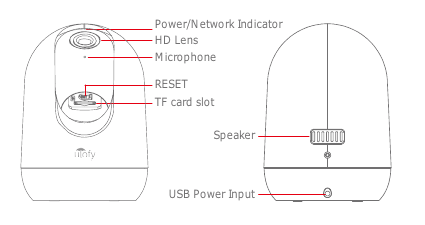
- Power/Network Indicator
- HD Lens
- Microphone
- RESET
- TF card slot
- Speaker
- USB Power Input
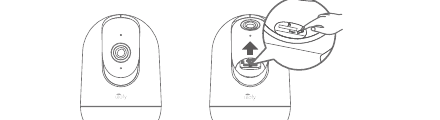
CAUTION: Please insert the Micro SD Card according to the direction shown in the diagram. Micro SD Card might JAM if inserted incorrectly and device could be damaged.
- SD Card Port: Support micro SD card for local storage (Max 128GB).
- Reset button: Used to restore the camera to factory settings. (Press and hold on 5-8s)
- Card capacity requirements: 8-128GB.
- Read and write speed requirements: Class10 level.
- File format: FAT32.
3. CloudEdge App Installation and Setup
Search "CloudEdge" on apple store or google play to download the app.
- from Google Play
- from Apple Store
4. Mounting the Camera
Put the camera on a flat surface.
Use the included mounting bracket to fix the camera to a clean surface.
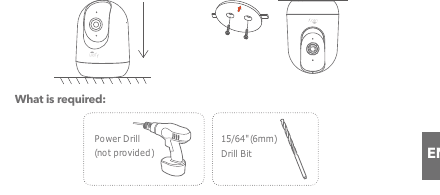
What is required:
- Power Drill (not provided)
- 15/64" (6mm) Drill Bit
5. Register an Account
The CloudEdge app that is necessary to operate the camera. Signing up for storage in the cloud is totally optional and is really not necessary when using an onboard Micro SD card.
Open the APP to sign up an account. Go to the login interface, and click "Sign Up".
Sign up with your email address, and click "Next".
Set up an "Nickname" and "Password" for your APP, click "Done" to complete.
6. Set up WiFi for the Camera
The camera can only connect to a 2.4 GHz WiFi signal. It does not support using a 5 GHz signal. Therefore, please ensure you connect to a 2.4 GHz signal on your network as shown in the below illustration.
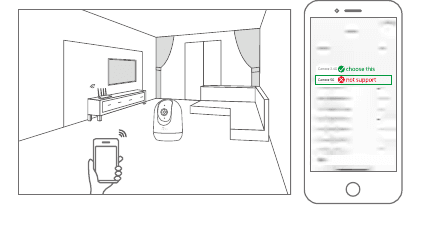
Bring both your mobile phone and your camera close to your router (max. distance of 5 meters/16 feet).
Log in to "CloudEdge", then tap the "+" icon in the center. Tap "Camera" to add device.
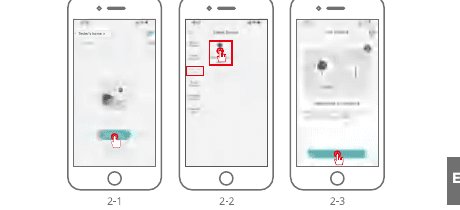
Reset the device and wait for a flashing RED indicator light, then tap "Next".
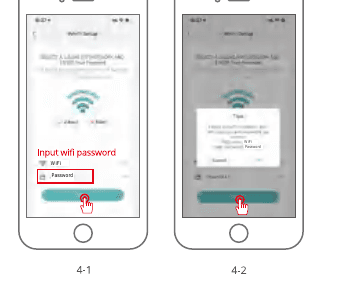
Selecting the Wi-Fi the device needs to connected with (your home Wi-Fi), input the password and click "Next".
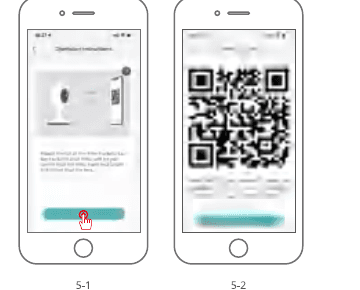
Use the camera to scan the QR code on your mobile phone as noted below. When the scan is complete you will hear a prompt tone then push Next.
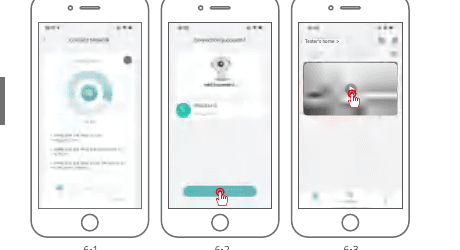
When connecting, as stated earlier, you should make sure that the router, mobile phone and the camera and are as close together as possible (max 5 meters/16 feet). When a successful connection occurs a "click" will be heard and a checkmark will be noted as shown below. The camera will show with a numerical name that can be changed to your likings such as Driveway Camera, Street View Camera or whatever.
7. Safety Statement
Precautions
- The applicable working temperature of this product is -20℃~50℃, please do not use it in an environment where the temperature is too high or too low.
- Please do not place the lens close to or facing the glass, white walls, or lighting objects, in order to avoid the picture being too bright, dark, or white.
- Please make sure that the camera is installed within the good Wi-Fi signal range, and placed it as near as possible to the router and try to install it far away from metal and microwave ovens that may affect the signal.
After-Sale Service and Technical Support
For after-sales service, please contact [email protected]. Describe the camera issue, and inform us of the order number, camera model, and Serial Number on the camera sticker, we will reply to you as soon as possible.
Legal notice
Symbols: ⎓ Direct current (DC)
Don't throw batteries or out of order products with the household waste (garbage). The dangerous substances that they are likely to include may harm health or the environment. Make your retailer take back these products or use the selective collect of garbage proposed by your city.
Hereby, Ulofy declares the radio equipment type 'PTcam' is in compliance with the Directive 2014/53/EU. The full test of the EU declaration of conformity is available at the Internet address: www.getulofy.com
PTZ Security Camera Quick Installation Guide
Quick installation guide for the indoor/outdoor PTZ Wi-Fi security camera, covering the packing list, appearance, CloudEdge app setup, mounting and troubleshooting.
ieGeek ZS-GX7S Indoor Camera
Quick start guide for the ieGeek ZS-GX7S wire-free indoor camera, covering camera parts, app setup, adding the camera, charging, installation, PIR motion settings, and FAQs.