 CloudEdge App Docs
Jennov Battery Camera Quick Start Guide
Quick start guide for the Jennov C Series battery, solar, and WiFi cameras, covering what's included, product overview, installation, solar panel mounting, and pairing through the CloudEdge app.
This quick start guide covers the Jennov C Series cameras (battery, solar, and WiFi models) and walks you through what's included, the product overview, installation, and pairing through the CloudEdge app.
The manual is a quick guide. Scan the QR codes in the booklet to access the detailed manual and instructional videos, and save the electronic document manual. If there are any issues, please contact after-sales support at [email protected]. For more help, see the battery camera FAQs.
1. What's Included
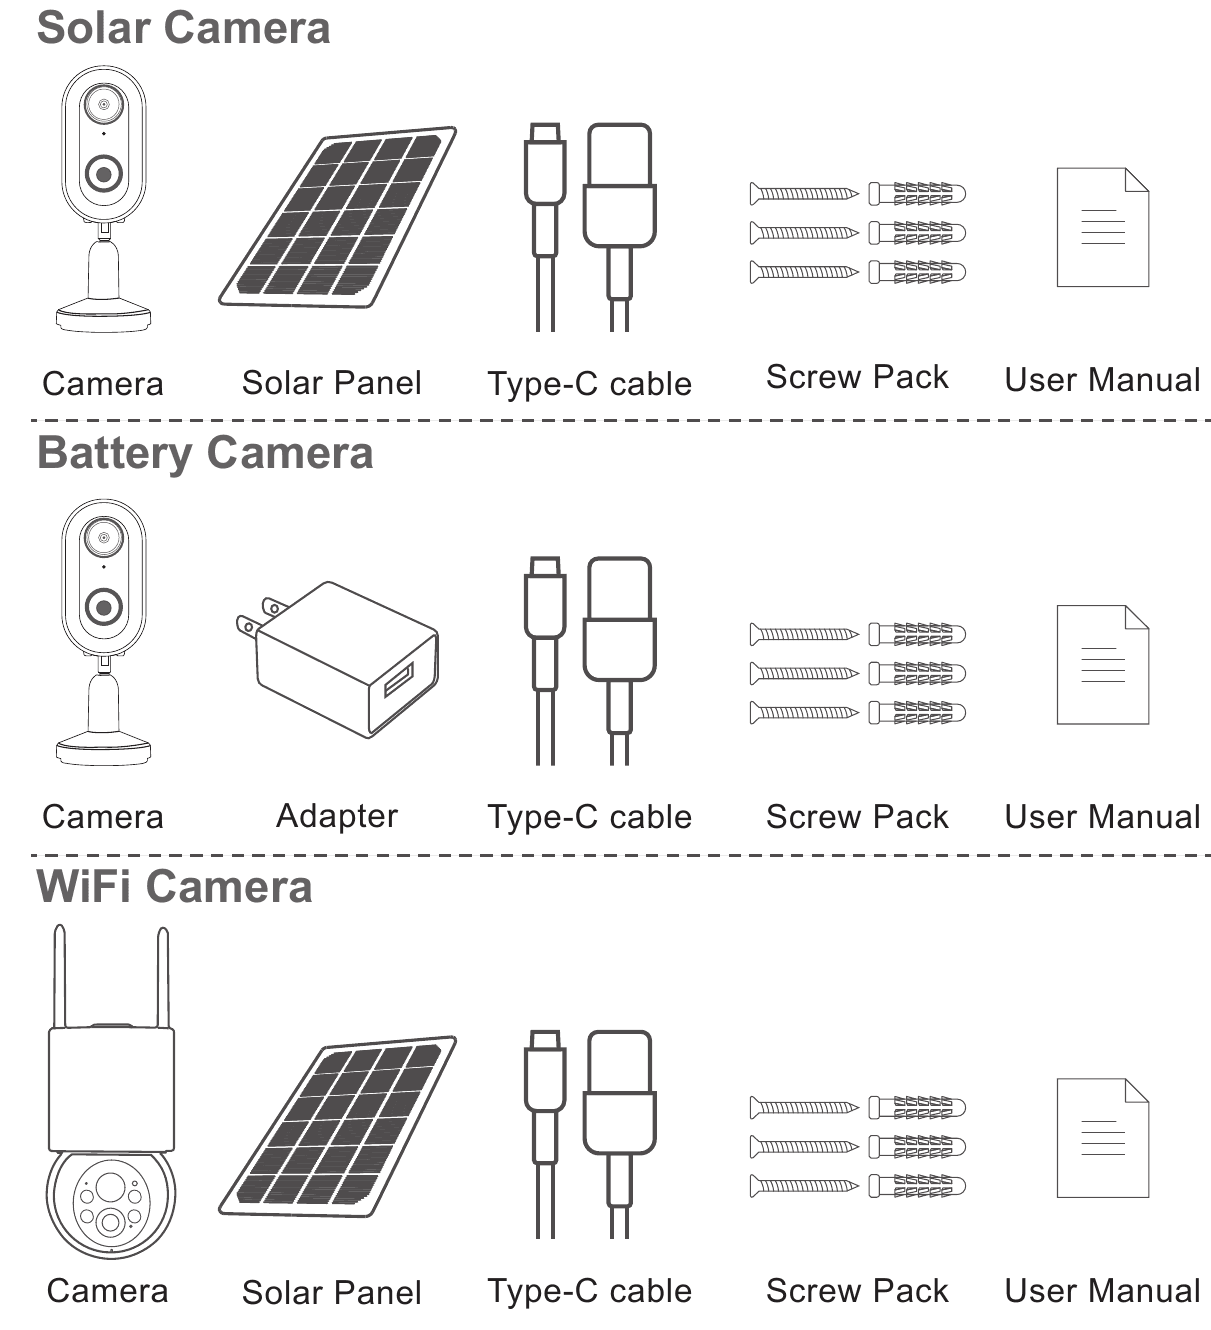
- Solar Camera — Camera, Solar Panel, Type-C cable, Screw Pack, User Manual
- Battery Camera — Camera, Adapter, Type-C cable, Screw Pack, User Manual
- WiFi Camera — Camera, Solar Panel, Type-C cable, Screw Pack, User Manual
The package list should refer to the list of the corresponding camera Model.
2. Product Overview
Battery / Solar Camera

- Lens
- White LED Light
- PIR Motion Sensor
- Indicator light
- Bracket
- MIC
- Power button
- Type-C Port
- Micro SD Card Slot
- Reset button
WiFi Camera

- Antenna
- Indicator light
- White LED Light
- Photosensitive Sensor
- PIR Motion Sensor
- Lens
- MIC
- Type-C Port
- Reset button
- Micro SD Card Slot
- Power button
Please insert the Micro SD Card according to the direction shown in the picture. If it is not inserted correctly, it may get stuck in the camera.
| Item | Specification |
|---|---|
| Power button | Please switch on the camera power before use. |
| SD card port | Support micro SD card for local storage (Max 128GB). Note: 64G cards will be more compatible. TF card is also known as microSD card. |
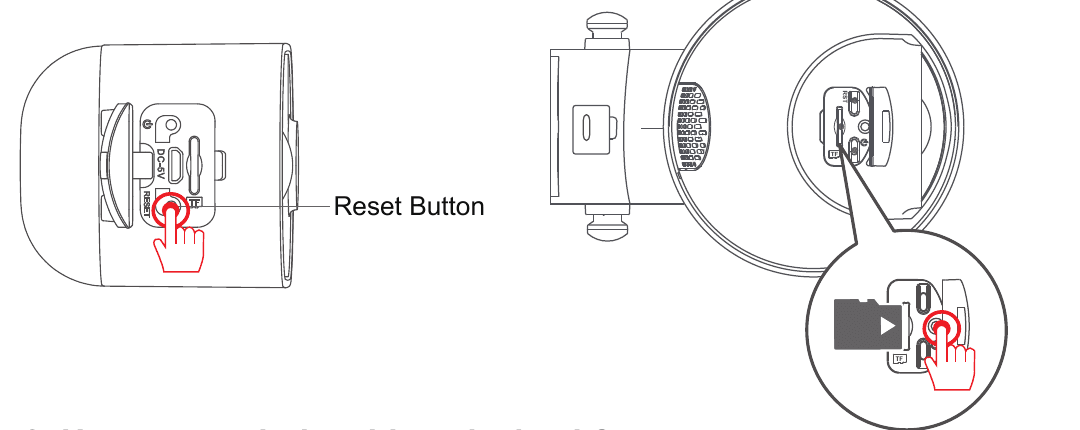
| Reset button | Used to restore the camera to factory settings (press and hold for 5-8s). |
| Card capacity requirements | 8-128 GB |
| Read and write speed requirements | Class10 level |
| File format | FAT32 |
3. Installation
Drill according to the position sticker, drill bit: 15/64 (6mm).
Insert the plugs.
Tighten the screw.


4. Installing the Camera
Select height and location
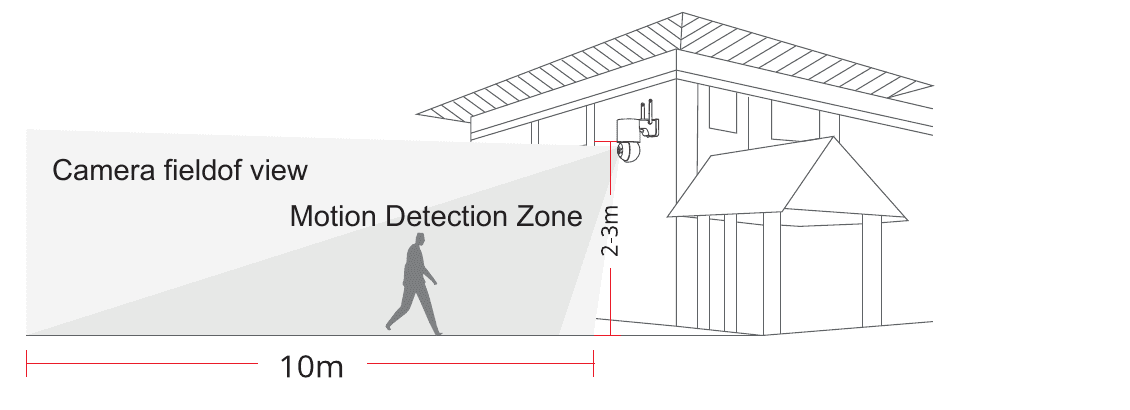
Install the camera 7-10 ft (2-3m) above the ground. This height maximizes the detection range of the motion sensor of the camera. Avoid placing the camera directly facing sunlight.
Test the WiFi signal at the installation position
Use a cell phone to test the WiFi signal quality at the installation position before installing the camera. Make sure the WiFi router can provide a good WiFi signal.

5. Installation Method of Solar Panels
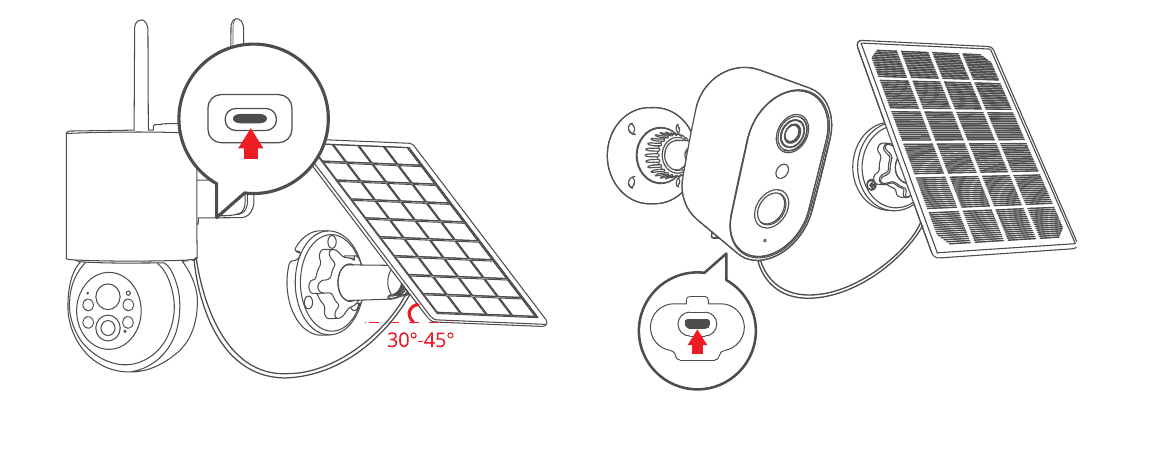
- Please install the solar panel at approximately 30-45 degrees from horizontal, as shown in the diagram below.
- The installation between the solar panel and the camera is illustrated in the following diagram (open the silicone cover at the bottom of the camera and plug in the power cord to the Type-C port).
Panel installation tips:
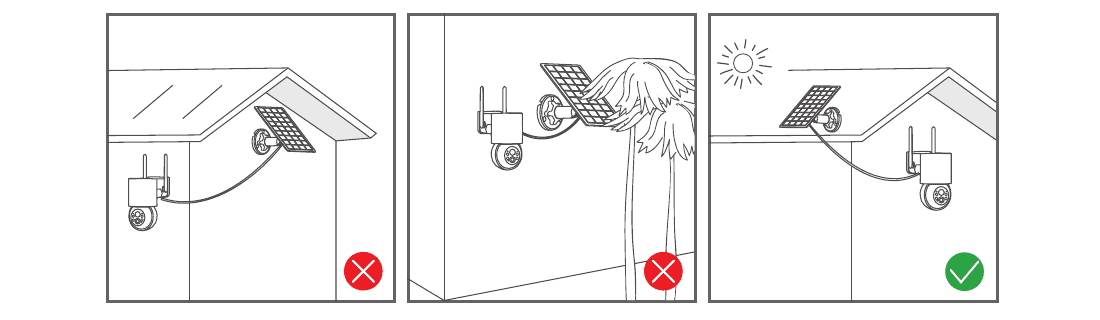
- Please place the panel in a south-facing direction with good sunlight exposure.
- Install the solar panel in an appropriate location, avoiding obstruction from eaves, tree branches, etc.
6. Connection Tips
- Both the phone and the camera must be placed near the Wi-Fi router, within a distance of 2 meters.
Friendly reminder: Please fully charge the camera with a USB cable before connecting. The camera can only connect to a 2.4GHz Wi-Fi signal. 5GHz Wi-Fi is not supported.
7. CloudEdge App Installation and Setup
Search "CloudEdge" on the App Store or Google Play to download the app — from Google Play, from the Apple Store, or scan the QR code in the booklet. The CloudEdge app is available for both iOS and Android.
Tips: Please turn on the 2 permissions below when you use this APP for the first time.
- Allow "CloudEdge" to access mobile cellular data and wireless LAN, or it will fail to add the IP Camera.
- Allow the "CloudEdge" APP to receive pushed messages, or the cellphone will not receive an alarm push when motion detection or an audible alarm is triggered.
8. Camera Connection Steps
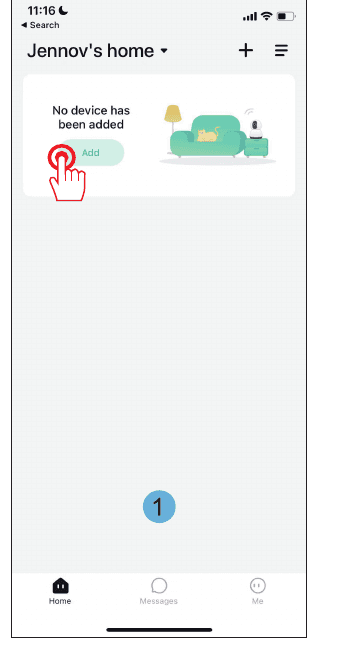
Open the app and tap "Add". If no device has been added, the home page shows an Add button.
On the Select Device page, choose "Battery Camera".

Hold the device power button to start the device. Press the [battery camera] button to wake up the device if it is asleep. Please stay near your router for the best signal.

Please reset the device. Hold the RESET button on your device for 4-5 seconds (please refer to the user manual for more on this). Wait for a flashing RED indicator light, then tap Next.

Select a 2.4GHz WiFi network and enter your password. The device does not work with 5G WiFi networks. Reconfirm that your WiFi account and password are correct.

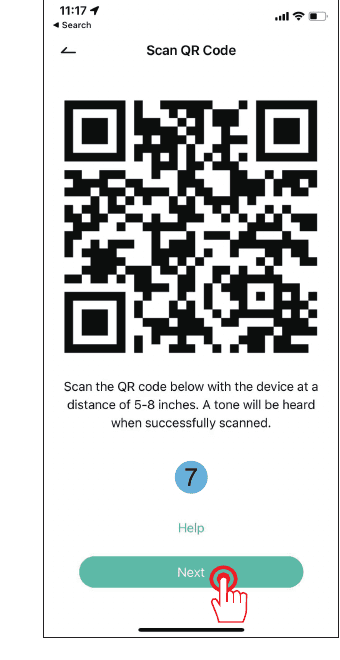
Operation instructions: remove all film from the lens. Tap Next to show a QR code, and let your device scan the code. Keep your phone 5-8 inches from the lens.

Scan the QR code with the device at a distance of 5-8 inches. A tone will be heard when successfully scanned. Tap Next.
Connect to the network. Make sure the device is powered on, connected to the router, and that the device and the phone are on the same network. The app searches the device, registers it to the cloud, and initializes it.

Connection successful — Add Successful. The new camera appears in the list.

Add Device — choose a family. Confirm the device name and select a family/home.

Network Diagnostic. When the WiFi signal strength shows "Strong", the current place is good and you can install the camera. Tap Done.

Done. The camera now appears on the home page with live view.

9. FAQs
1. The camera can not connect to WiFi, how to do?
Reset the camera: press and hold the "RESET" for 10 seconds until the "ding" beep indicates a successful reset, then connect again. Please note that the camera only supports 2.4G WiFi.
2. How to watch the video playback?
Click "Replay" in the main interface to play back videos stored on the TF card.
3. How to share to others and how many devices can I share at most?
Go to Settings, click "Invite new member" to set up sharing. For the main account, you can share to 3 users, and it supports 3 users to watch at the same time.
4. Why can't I connect to the network?
Firstly, please try to reset the camera, then make sure your router is 2.4G, confirm, and re-add the camera.
5. Can the camera record without network?
The camera can record video even when it is offline.
10. Warranty
Please fill in the following information or scan the QR code in the booklet to activate the free 12-month warranty from the order date.
After finishing filling or scanning, please take a picture and send it to the email ([email protected]). Then your free warranty will take effect. During the warranty period, if any parts of the product are damaged, please contact us immediately and we will provide a satisfactory resolution.
You will be asked for: Order Date, Order Number/ID, Buyer E-mail, and Buyer Tel.
Contact us
- Website: www.jennov.com
- Email: [email protected]
- U.S Hotline: +1 3239021978
ieGeek ZS-GX3S Battery Camera
User manual for the ieGeek ZS-GX3S wire-free battery camera, covering camera parts, app setup, charging, installation and FAQs.
JouSecu ZS-GX5 Battery Camera
User guide for the JouSecu ZS-GX5 wire-free rechargeable battery security camera, covering setup in the CloudEdge app, PIR detection, night vision, battery management and troubleshooting.