 CloudEdge App Docs
EUKI J10 Video Doorbell
User manual for the EUKI J10 1080P battery-powered video doorbell camera, including setup, chime pairing, installation, and troubleshooting.
The EUKI J10 is a 1080P battery-powered video doorbell camera with a wireless indoor chime, managed through the CloudEdge app.
Need help? Problems are often solved by changing a single setting. If your doorbell does not work as expected, check the Troubleshooting section below, or browse the Doorbell FAQs.
1. Meet the doorbell
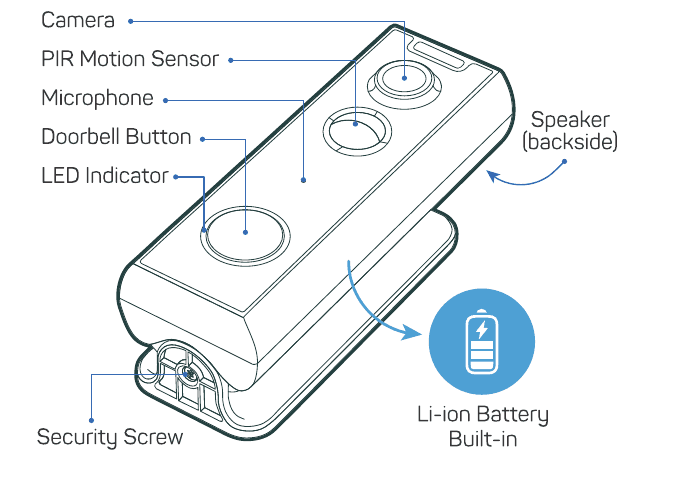
- Camera
- PIR Motion Sensor
- Microphone
- Doorbell Button
- LED Indicator
- Speaker (backside)
- Security Screw
- Li-ion Battery (built-in)
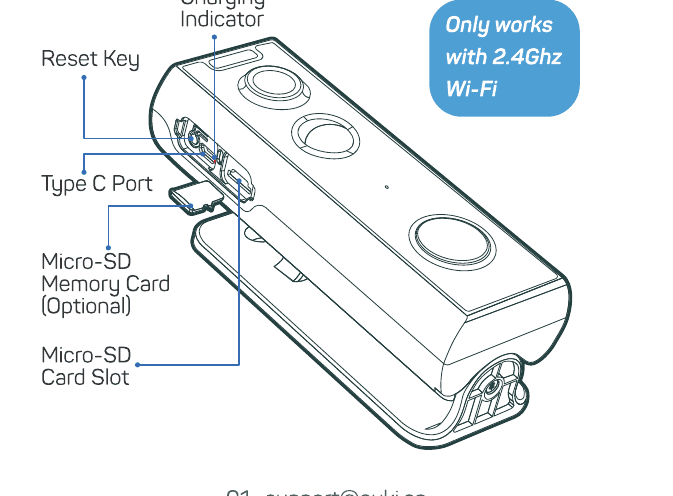
- Charging Indicator
- Reset Key
- Type-C Port
- Micro-SD Memory Card (optional)
- Micro-SD Card Slot
The doorbell only works with 2.4 GHz Wi-Fi.
2. Meet the chime
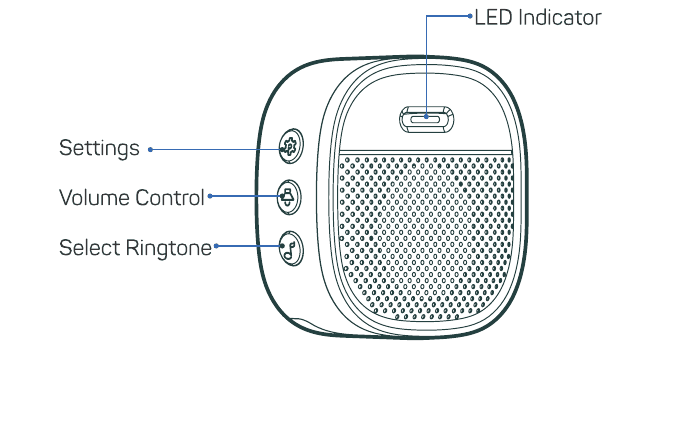
- LED Indicator
- Settings
- Volume Control
- Select Ringtone
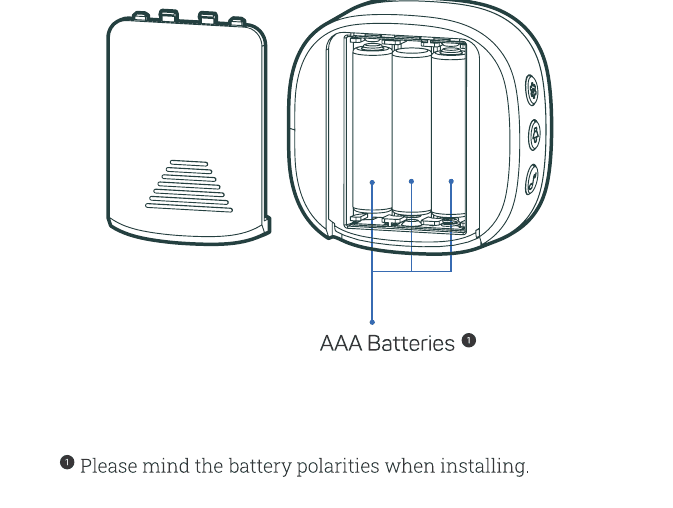
The chime is powered by AAA batteries.
Please mind the battery polarities when installing.
3. Charge your doorbell
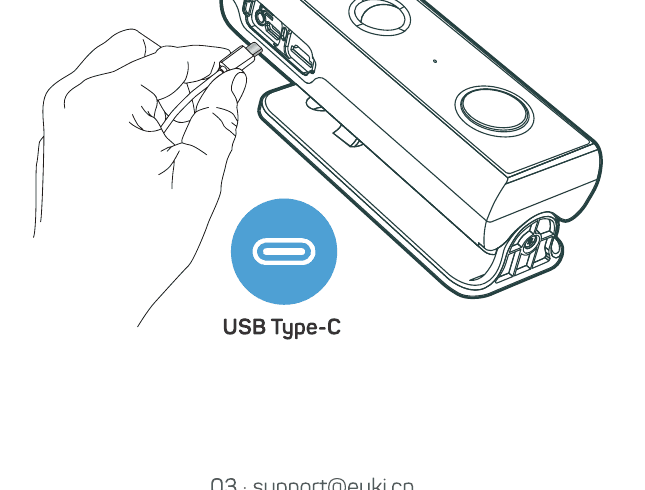
Prior to installation, charge the doorbell for about 8–10 hours until the charging LED turns BLUE from RED.
| LED status | Indication |
|---|---|
| Solid red | Battery charging |
| Solid blue | Fully charged |
Compatible charger (not provided): USB Type-C mobile phone charger (DC 5V — 1A–2A).
4. App download
Search "CloudEdge" in the App Store or Google Play, or scan the QR code in the box, to download the app for iOS and Android.
5. Set up doorbell
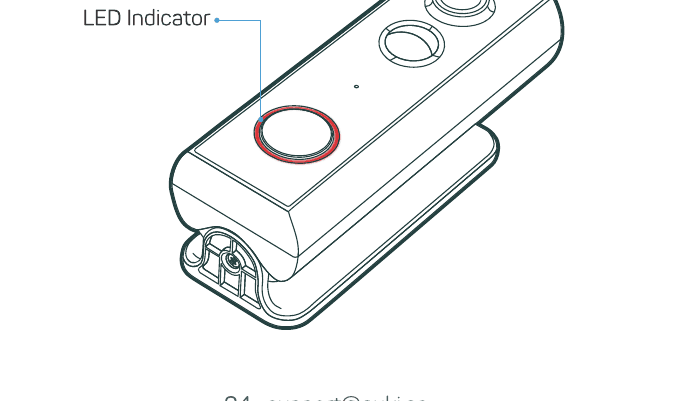
Press your doorbell to activate it; the LED indicator will flash red (once per second). If it does not, press and hold the reset button for 5 seconds to restore factory defaults.
Start setting up your doorbell by following the in-app instructions.
Tips
- Operate the setup near your Wi-Fi router.
- Make sure your phone is connected to a 2.4 GHz Wi-Fi network.
- Make sure the doorbell is turned on and its indicator LED is flashing red. If not, press and hold RESET for 5 seconds.
- Ensure the Wi-Fi signal is good and the Wi-Fi password is correct.
| LED status | Indication |
|---|---|
| Solid red | Device is abnormal |
| Flash red (once/sec) | Ready for Wi-Fi configuration |
| Flash red (twice/sec) | Connecting to Wi-Fi |
| Solid blue | Device is online |
| Flash blue (once/sec) | Live-viewing doorbell cam |
| Flash blue (twice/sec) | Firmware upgrading |
6. App Instructions
Start setting up your doorbell by following the in-app instructions. Scan the "Scan me" QR code in the manual to view the in-app guide.
7. Pair with your indoor chime
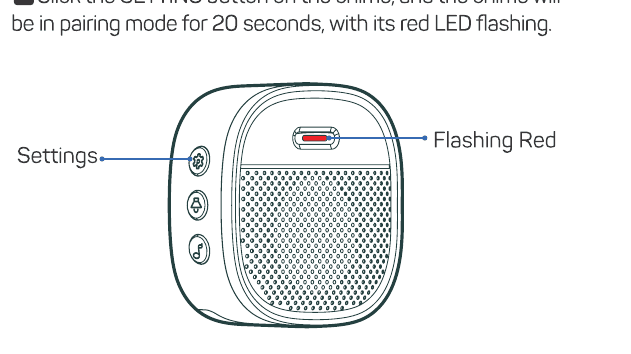
Click the SETTING button on the chime. The chime will enter pairing mode for 20 seconds, with its red LED flashing.
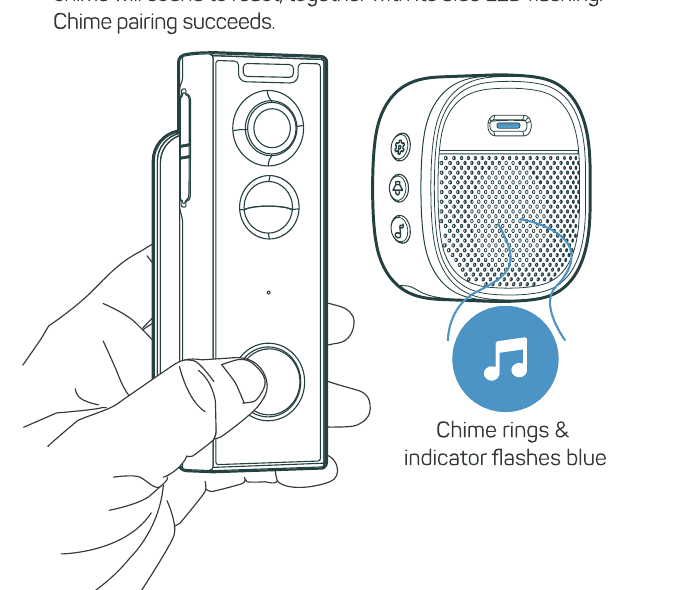
Press the doorbell button to send a pairing signal. The chime will sound to react, together with its blue LED flashing. Chime pairing succeeds.
Chime settings
 Settings — Click to enter/quit pairing mode; press & hold for 5 seconds to restore factory defaults.
 Volume control — Click to control volume: level 1: 110 dB; level 2: 100 dB; level 3: 90 dB; level 4: 80 dB.
 Ringtone selection — Click to change ringtone (4 ringtones available).
8. Install your doorbell
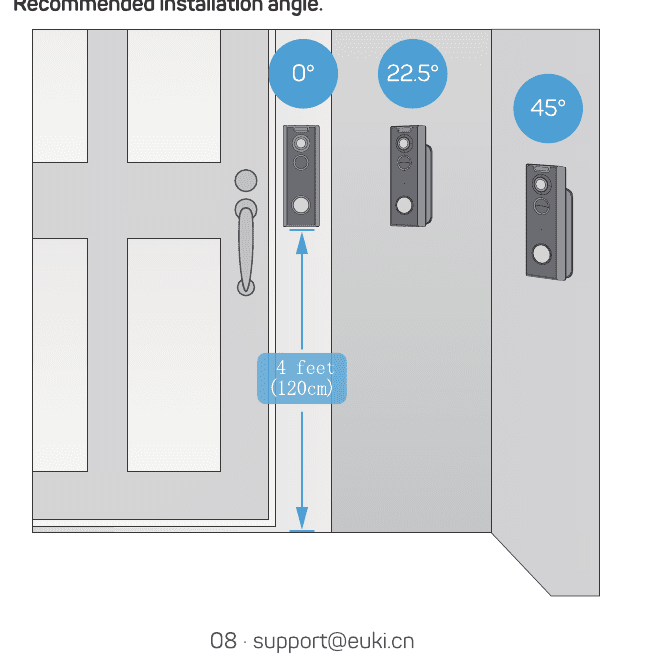
Determine the installation spot
The doorbell mount is flexible, with 5 viewing-angle options.
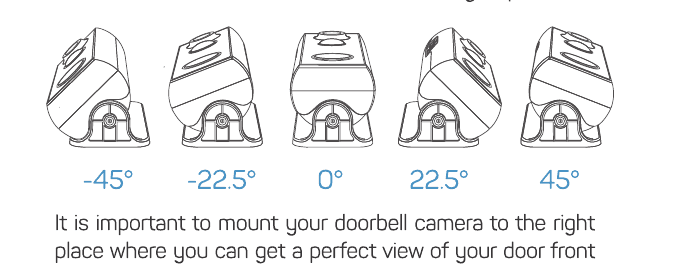
It is important to mount your doorbell camera in the right place, where you get a perfect view of your door front and improve its motion-detection performance.
Installation steps
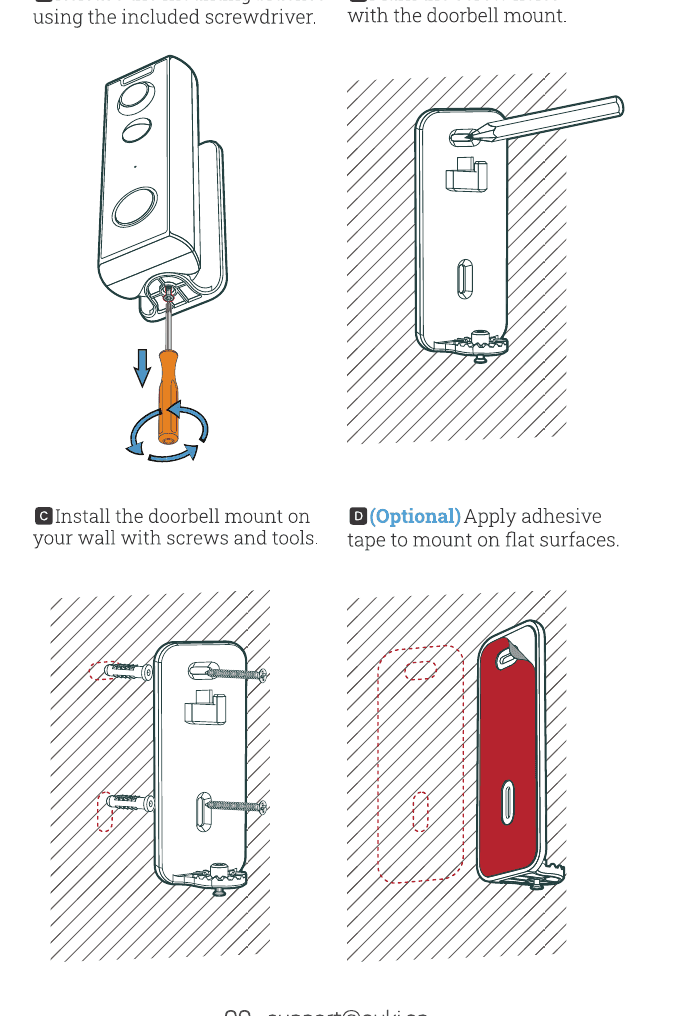
- A — Release the mounting bracket using the included screwdriver.
- B — Mark the screw holes with the doorbell mount.
- C — Install the doorbell mount on your wall with screws and tools.
- D (Optional) — Apply adhesive tape to mount on flat surfaces.
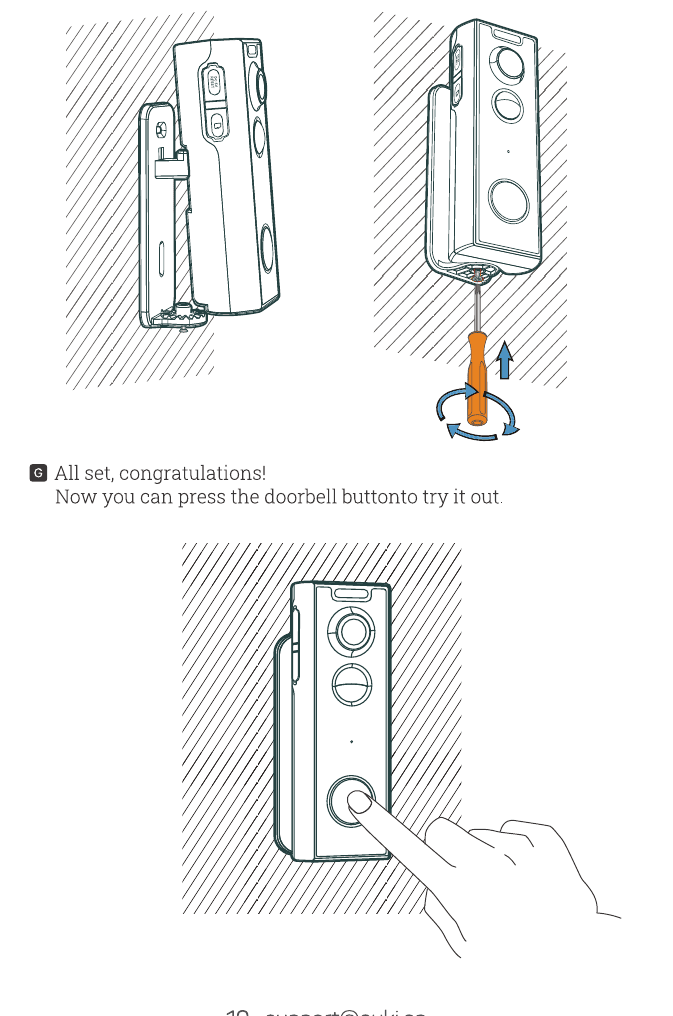
- E — Hook the doorbell onto the fixed doorbell mount.
- F — Adjust the doorbell angle and lock up the security screw.
- G — All set, congratulations! Now you can press the doorbell button to try it out.
9. Troubleshooting
Q1: Wi-Fi connection abnormal / cannot access the Wi-Fi.
- Confirm whether your Wi-Fi is 2.4 GHz.
- Confirm your Wi-Fi name and password are correct, and do not include special characters (
!@#$). - Confirm your doorbell is fully charged for the first setup to the phone.
- Confirm the bell button indicator light.
Q2: How to share the doorbell with family members / manage the doorbell with multiple devices.
- Download the CloudEdge app on each phone, and use an email address to sign up for an account for each device. The app does not support logging in to different devices under the same account at the same time.
- Scan the QR code in the manual to learn about sharing devices.
Q3: How to turn on the doorbell intercom function.
Authorize the "Microphone" permission in the phone settings for your doorbell camera app.
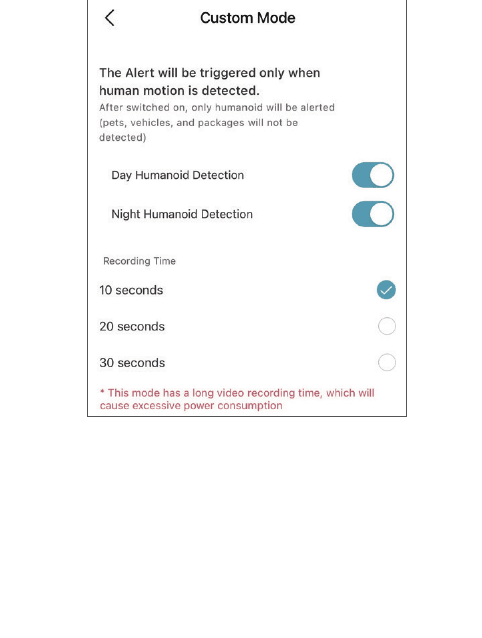
Q4: Only detects human movement when they leave.
- Turn up the Motion detection sensitivity in the app settings (5 is the highest sensitivity level).
- Turn off the humanoid detection motion setting of the Custom mode in the "Motion detection" function.
Q5: There are too many false motion-detection notifications.
Turn on the humanoid detection motion setting of the Custom mode in the "Motion detection" function.
Still need help? Visit the Doorbell FAQs or contact EUKI customer support at [email protected].
COOAU BELL J6 PLUS Video Doorbell
Complete user manual for the COOAU BELL J6 PLUS wireless video doorbell, covering setup with the CloudEdge app, live view, recording, chime pairing, installation and troubleshooting.
EUKI J7 Video Doorbell
User manual for the EUKI J7 2K battery-powered video doorbell, covering device overview, charging, app setup, chime pairing, installation, and tamper alarm.